
The daith piercing healing stages can stretch anywhere from 6 to 12 months, so knowing what each phase looks like saves you from a needless panic spiral. At daithpiercing.io, we break the full daith piercing timeline down into clear, week-by-week and month-by-month checkpoints to help you navigate the journey. While some sources claim a quick 3-month turnaround and others suggest a grueling 18-month wait, the reality of the daith piercing healing process lies somewhere in the middle.
By understanding exactly what to expect from the initial crusties to the deep internal tissue maturation you can ensure your piercing remains healthy and vibrant. We promise to cover every stage, highlighting what is normal and what signals a potential complication.
Daith Piercing Healing
| Phase | Timeline |
| Total healing time | 6 to 12 months (cartilage standard) |
| Initial swelling phase | Days 1 to 14 |
| Surface healing | Weeks 6 to 12 |
| Internal cartilage healing | Months 4 to 9 |
| Safe to change jewelry | After full piercer-confirmed healing |
| Common during healing | Lymph fluid, piercing crusties, mild tenderness |
What Are the Daith Piercing Healing Stages?
Understanding the daith piercing healing stages is essential because this particular ear modification is a marathon, not a sprint. Unlike a soft lobe piercing, the daith piercing healing process involves a complex 5-stage progression through dense tissue. The primary reason for the extended daith piercing recovery stages is that the daith is located in a thick fold of cartilage, which naturally has limited blood flow compared to other parts of the body.
According to the Association of Professional Piercers (APP), you should expect a standard window of 6 to 12 months for the area to settle completely. To help you manage expectations, we categorize the recovery into five main phases, the Inflammatory Phase, the Acute Healing Phase, the Proliferation Phase, the Maturation Phase, and finally, Full Maturation. Each of these milestones plays a vital role in ensuring the fistula (the tunnel of flesh) strengthens without infection or scarring.
Daith Piercing Healing Stages Week by Week (Week 1 to Week 12)
Navigating the daith piercing healing stages week by week requires patience, as the full daith piercing healing stages week 1 to week 52 represent a year-long commitment. While the first three months show the most visible progress, your consistency here determines long-term success.
Week 1 Piercing: The Inflammation Stage
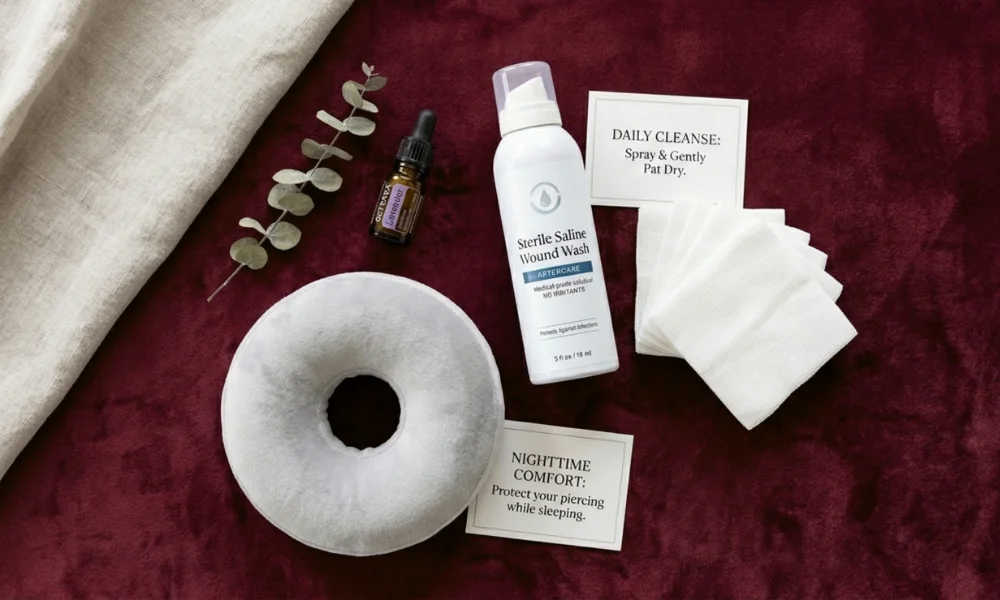
Expect significant swelling, redness, and throbbing. Light bleeding is normal for the first 72 hours. To protect the site, avoid earbuds, keep hair pinned back, and never sleep on the piercing. Start sterile saline cleanings on day one; for more on early sensations, check our guide on daith piercing pain.
Week 2 Piercing: Early Acute Healing
Throbbing subsides as swelling drops, though tenderness remains during facial movements. You will notice crusties (dried lymph fluid), which should be soaked off with saline, never picked. Continue avoiding external pressure from hats or hair products.
Weeks 3 and 4: Settling In
By the one-month mark, the piercing feels settled and active pain fades. However, the internal fistula is still incredibly thin and prone to tearing. Avoid all jewelry changes or rotations, as the internal tissue remains highly unstable.
Weeks 5 to 8: The Proliferation Stage
During this phase, the tissue tunnel forms more permanently. The surface may look “healed,” but this is actually the peak window for irritation bumps if the area is snagged. Visit your piercer between weeks 6 and 8 for a professional downsizing consultation.
Weeks 9 to 12: End of Surface Healing
By week 12, external tissue usually closes, making the site look clean. Despite this, the internal cartilage is still recovering. Stopping aftercare now is a mistake; stay diligent with saline rinses to prevent bacteria from entering the maturing internal tunnel.
Daith Piercing Healing Stages Month by Month (Month 1 to Year 1)
Tracking your daith piercing month by month helps manage expectations during this long-term commitment. While the most visible changes happen early, the monthly milestones mark the gradual strengthening of the internal cartilage.

Month 1 Piercing: Establishing the Baseline
By day 30, you’ve moved past the high-inflammation stage. Normal at this point is a piercing that is no longer throbbing but may still produce occasional crusties. Maintain a strict twice-daily saline cleaning routine to keep the baseline stable and prevent bacteria from entering the developing fistula.
Month 3 Piercing: Mid-Healing Check-In
At three months, the surface often looks completely healed. However, the internal tissue is still soft and fragile. You will notice the area is less reactive to touch, but you must avoid jewelry swaps, as the internal tunnel is not yet strong enough to withstand the friction of a change.
Month 6 Piercing: The Halfway Point
This is the major milestone where most discomfort vanishes. About 50% of people achieve stability by now. If you have not downsized your jewelry to a more snug fit, visit your piercer now. This prevents the jewelry from sliding and irritating the maturing cartilage.
Month 9 to Year 1 Piercing: Full Healing
By month 9, roughly 70% of wearers are fully healed. Look for the Golden Rule, one full week with zero discharge, zero crust, and zero soreness. Reaching the year 1 piercing mark signifies the end of the aftercare phase, meaning it is finally safe to switch to decorative jewelry styles.
What Should Daith Piercing Look Like Each Week?
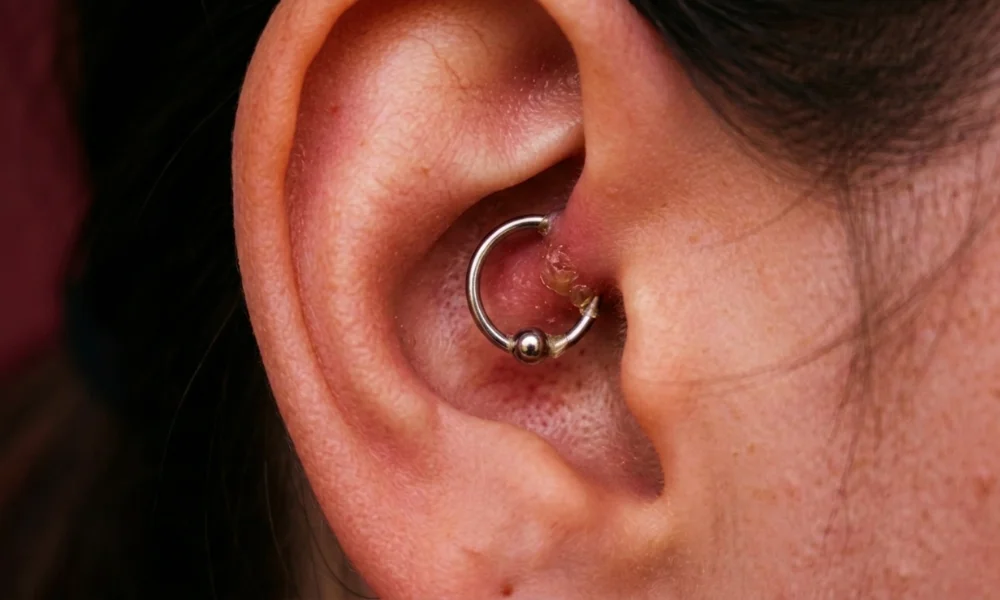
Understanding what should daith piercing look like each week is the best way to distinguish healthy progress from potential infection. Because visual cues shift rapidly, comparing your ear to daith piercing healing progress pictures by week can provide peace of mind.
Generally, your healing will follow a specific color-coded progression:
-
Weeks 1–2 (Red/Deep Pink): Expect visible swelling and a tight appearance. Small amounts of dried blood or clear fluid are normal.
-
Weeks 3–8 (Pale Pink): Swelling subsides, but you will see crusties (pale yellow or white) around the jewelry. This is a sign of healthy lymph drainage.
-
Weeks 9–52 (Natural Skin Tone): The redness disappears. The skin should look smooth and matte around the entry and exit points.
| Stage | Normal Cues | Concerning Cues |
| Early | Bright pink skin, clear fluid | Dark purple skin, thick green pus |
| Mid | Pale pink, dry white crusts | Receding skin, red angry bumps |
| Late | Normal skin tone, no crusts | Unexpected tenderness or heat |
Troubleshooting Across the Daith Piercing Healing Stages
Most guides treat issues as a one size fits all problem, but the daith piercing healing stages present specific risks at different times. Mapping your symptoms to your current stage helps you decide whether to stay the course or seek professional help.
Bumps in Early Daith Piercing Healing Stages
If you notice a bump between week 2 and month 3, it is likely an irritation bump rather than an infection. This often occurs during the Proliferation Stage when the tissue is most reactive to movement or pressure. To manage this, stick to a strict saline soak protocol and ensure you are not sleeping on the ear. For a deeper dive into treatment, see our guide on daith piercing bumps.
Lymph Fluid and Piercing Crusties Through Healing
Expect to see piercing crusties and clear or pale yellow lymph fluid throughout weeks 1 to 12. This is a vital part of the daith piercing healing process. However, if the discharge becomes thick, opaque, or turns green, it is a signal of infection. To remove crusties safely, soak the area with saline until they soften, then gently pat never pick them away.
When to See a Piercer or Doctor
While some discomfort is expected, you should seek medical or professional advice if you experience:
-
Infection Signs: Red streaks radiating from the site, skin that feels hot to the touch, fever, or foul-smelling pus.
-
Persistent Bleeding: Any bleeding that continues past the initial week 2 window.
-
Migration/Rejection: If the jewelry visibly shifts toward the edge of the cartilage or the skin between the holes becomes thinner.
Stage-Specific Aftercare for Each of the Daith Piercing Healing Stages
Generic advice often fails because your needs change as you move through the daith piercing healing stages. Tailoring your routine ensures you don’t over-clean or neglect the wound at critical milestones.
| Healing Window | Primary Focus | Key Actions |
| Weeks 1 to 4 | Infection Prevention | Sterile saline twice daily, absolute no-touch policy: strictly no earbuds; sleep on the opposite side. |
| Weeks 5 to 12 | Stability & Downsizing | Saline 1–2 times daily: visit your piercer for a downsizing check; keep hair products and perfumes away from the site. |
| Months 4 to 12 | Internal Maturation | Saline once daily until all discharge stops: avoid all jewelry changes; monitor for late-stage irritation bumps. |
Regardless of the stage, strictly avoid home remedies like alcohol, hydrogen peroxide, or tea tree oil. These substances are far too harsh for cartilage and can cause chemical burns, significantly delaying the daith piercing healing process by killing the very cells trying to repair your ear. Stick to 0.9% sodium chloride solutions only.
Healing Milestones to Track Across Daith Piercing Recovery Stages
Tracking specific healing milestones allows you to measure your progress against the standard daith piercing recovery stages. Use this checklist to ensure your ear is hitting the right markers at the right time:
-
Day 7: Initial inflammatory swelling begins to drop.
-
Week 4: The piercing achieves its first stable”look with reduced redness.
-
Week 8: The optimal downsizing window opens; visit your piercer to swap for a shorter post.
-
Month 3: Significant external healing milestone; the surface appears closed.
-
Month 6: Mid-cartilage healing; deep soreness should be entirely absent.
-
Month 9 to 12: Full healing confirmed by a professional piercer; safe for decorative jewelry.
Conclusion
The daith piercing healing stages represent a 6 to 12-month commitment through a specific 5-stage framework. It is vital to remember that surface healing is not full healing; while your ear may look calm on the outside, the internal cartilage requires the full daith piercing recovery stages to reach permanent stability.
For ongoing support including deep dives into aftercare, managing bumps, or understanding pain daithpiercing has you c
overed at every checkpoint. Protect your investment by staying patient and consistent until you hit that final year-one milestone.
Frequently Asked Questions
How long do the daith piercing healing stages take in total?
While initial sensitivity fades quickly, a daith piercing requires a full 6 to 12-month commitment for the internal cartilage to stabilize. Because the daith is located in a dense, low-vascularity fold of the ear, patience is required to ensure the tissue matures completely from the inside out.
What does week 1 of a daith piercing look like?
Expect your ear to look angry during the first seven days. Common visual cues include localized swelling, a persistent pink or red hue, and occasional spotting of blood. This is your body’s natural inflammatory response working to jumpstart the repair process.
Is lymph fluid normal during daith piercing healing?
Absolutely. Secreting a translucent or pale-amber fluid (lymph) is a hallmark of healthy cartilage recovery. This fluid often dries into crusties around your jewelry; as long as the discharge isn’t opaque, green, or foul-smelling, your healing is on the right track.
When can I change my jewelry?
You should wait at least 9 to 12 months before swapping your initial ring for decorative styles. Attempting a change before the internal tunnel (fistula) is fully keratinized can cause microscopic tearing, leading to immediate swelling or the formation of irritation bumps.
Why do my piercing crusties keep coming back?
Crusties are a recurring byproduct of the proliferation stage, where the body constantly sheds cells and fluid to build new tissue. They will continue to reappear periodically until the piercing is 100% matured. Simply soften them with a saline soak rather than picking them off to avoid irritating the site.