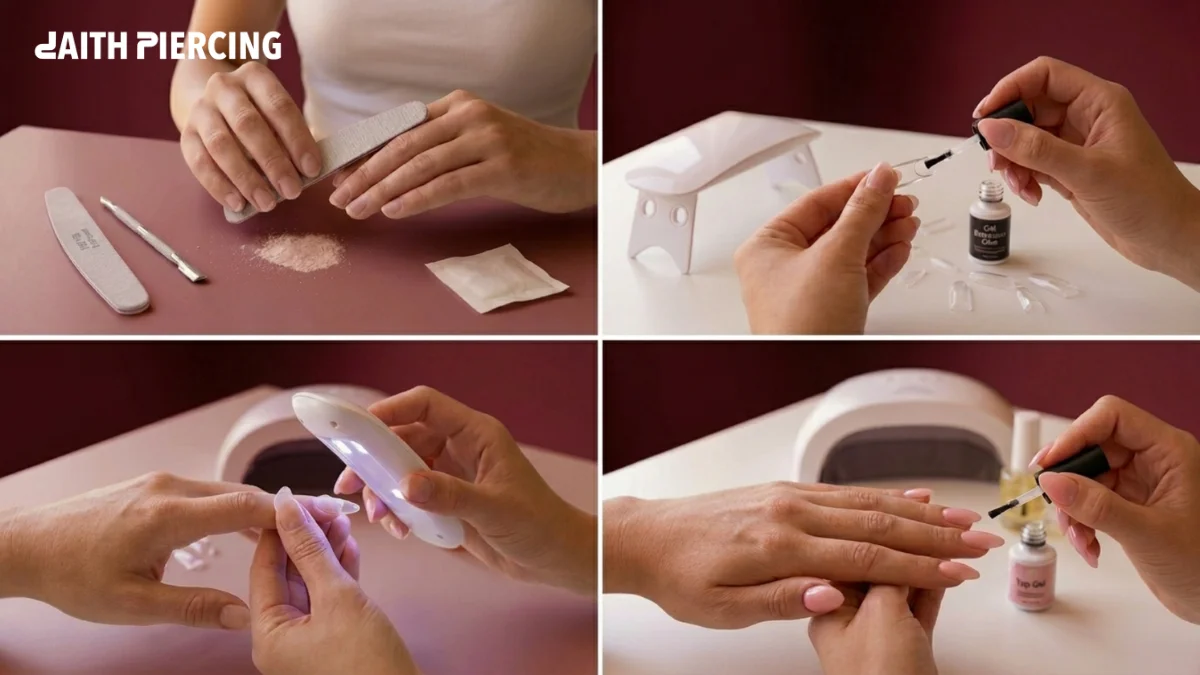
Soft gel nail extensions at home are basically the salon Gel-X manicure your nail tech charges you $80 for. The kit costs $30. The set lasts a month. Yeah, I was annoyed when I figured that out too. You need gel tips, base gel, glue gel, an LED lamp, and roughly 45 minutes. That is it.
At DaithPiercing we actually test this stuff before we write about it. So this nail extension tutorial beginner guide is the version I wish someone had handed me the first time my $30 KISS kit showed up and I sat there staring at twelve tiny baggies of clear plastic-looking nails.
If your tips keep popping off by day three, or you have been adding kits to cart and chickening out, keep reading.
What Are Soft Gel Nail Extensions at Home and Why They Trend in 2026
Soft gel tips are full nails made out of soak-off gel. Not plastic. Big difference. They look like press-ons but you skip the glue entirely. The bond happens when gel hardens under a UV or LED lamp. Snug fit, no clicking sound when you tap a coffee cup, no falling off in the shower.
Acrylic? That needs a monomer, an e-file, and a smell that makes your eyes water. Soft gel skips every bit of it. The tips bend a little, weigh almost nothing, and come off cleanly in acetone. That is the whole reason at home gel nail extensions 2026 is climbing search trends month after month.
Real talk on price. A Gel-X set in NYC runs $90 to $110. In smaller US cities maybe $60. A KISS or Peppi kit from Target runs $30 and stretches three or four sets. Math is math.
Soft Gel vs Hard Gel Nails: Which One Wins for Home Use
The soft gel vs hard gel nails thing is not just trivia. Pick wrong and you will thin out your real nail trying to file the stuff off.
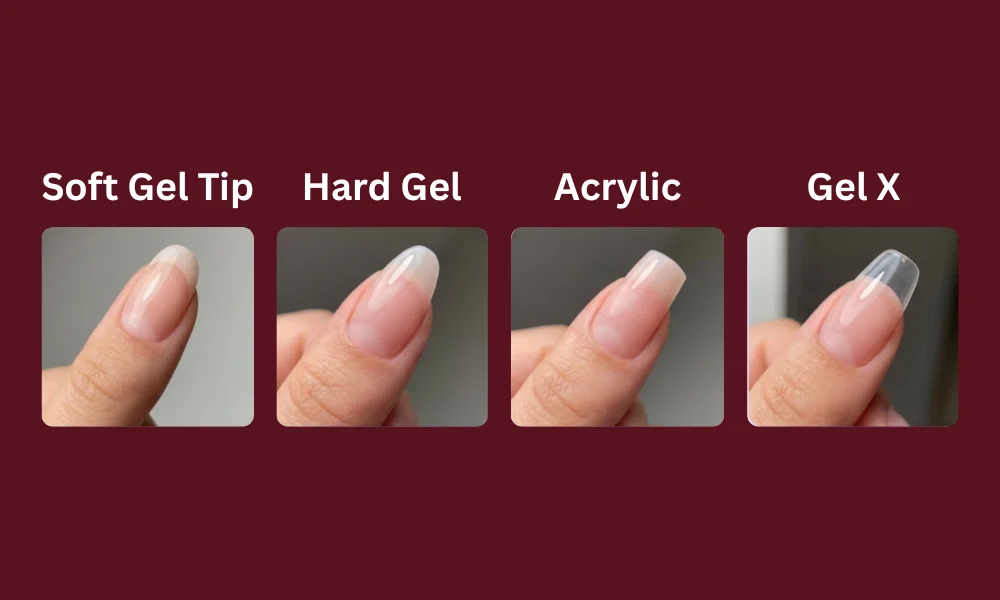
Soft gel flexes a little. Soaks off in pure acetone in fifteen minutes. Hard gel? Rigid. Would not soak. You have to file it down. And when you are new at this, you file too hard, hit the natural nail, and three months later you are growing out ridges.
| Feature | Soft Gel Tips | Hard Gel | Acrylic | Gel-X (Brand) |
|---|---|---|---|---|
| Wear Time | 3 to 4 weeks | 4 to 6 weeks | 3 to 4 weeks | 3 to 4 weeks |
| Removal | Acetone soak | File off | Acetone + file | Acetone soak |
| Nail Damage | Low | Medium | High | Low |
| Application | 45 min | 90 min | 90 min | 45 min |
| Beginner Friendly | Yes | No | No | Yes |
| Cost per Set (DIY) | $25 to $40 | $50 to $80 | $20 to $35 | $40 to $60 |
| Odor | Low | Low | Strong | Low |
| Lamp | LED | LED or UV | None | LED |
Soft gel wins for beginners. Cheaper, faster, kinder to your real nails. Not really up for debate.
DIY Soft Gel Extensions Kit: What You Need to Start
A proper DIY soft gel extensions kit has three buckets. Get all three sorted before you sit down, or trust me, you will be wandering around your bathroom with one hand half-cured looking for cotton pads.
Essentials Inside Every Soft Gel Nail Extensions at Home Kit
These are the non-negotiables, miss one and the whole set falls apart by day three:
- Pre-shaped soft gel tips in 12 sizes
- Base gel (also called bond gel on some bottles)
- Gel adhesive or builder gel
- LED nail lamp, 48 watts or stronger
- Top coat gel
Prep Tools You Cannot Skip
This is the prep crew, boring but the difference between a set that lasts a month and one that peels off in the shower:
- 180/240 grit nail buffer
- Cuticle pusher, wooden if possible
- 99% isopropyl alcohol
- Lint-free wipes (cotton pads leave fuzz, ask me how I know)
- Nail dehydrator
Finishing Touches
The fun part, this is where your nails actually start looking like a finished set.
- 150/180 grit nail file
- Cuticle oil
- Gel polish or nail art brushes if you want color
KISS, Peppi Gel, and Revel Nail all sell starter kits that bundle this stuff for $30 to $50. So if shopping for ten things sounds like a headache, just grab a kit and skip the spreadsheet.
How to Do Soft Gel Nails at Home: 8-Step Tutorial
Okay here is the how to do soft gel nails at home part. Read through it once before you actually start. You do not want to be halfway through with goop on one hand realizing you forgot what step 4 said.
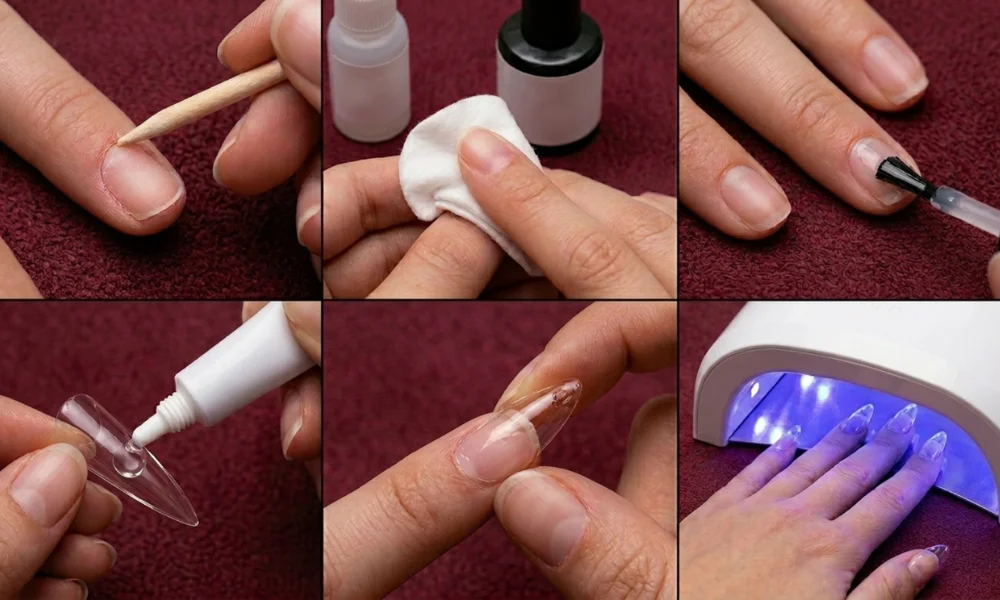
1: Prep Your Natural Nails
Push your cuticles back with the wooden pusher. Trim short. Buff off the shine with a 180 grit. Done. Do not get carried away with the buffer though, you will thin out the nail plate and it is sore for days. Wash your hands after, dry them properly, one bit of water trapped under there and the tip is toast.
2: Cleanse and Dehydrate
Wipe every nail with a lint-free pad soaked in 99% isopropyl alcohol. Skip this and your tips are gone by Wednesday, I am telling you. The oils on your nail bed and gel just do not get along. And do not go scrolling on your phone or rubbing your face after, that puts the oil right back on.
3: Size Every Soft Gel Tip
Lay all ten tips on your nails first. Do not apply anything yet. Each one should sit flat across the whole nail without pinching the sides. Caught between sizes? Just go up and file the edges down later. Line them up on a paper towel in finger order once you are sorted, future you will be glad at step five.
4: Apply Base Gel and Flash Cure
Thin layer of base gel on the natural nail. Thin. Flash cure 10 seconds under the lamp. Whatever you do, keep the gel off your skin, gel allergies are no joke and once you have got one, you are done with gel for life. Do one hand at a time too, not all ten at once.
5: Fill the Soft Gel Tip with Adhesive
Squeeze gel adhesive into the inside of the tip. About 70% full. Too much spills onto your cuticle. Too little leaves bubbles. Run the nozzle along the inside in one slow line instead of dotting it in spots, that’s the trick.
6: Place the Tip at a 45 Degree Angle
Press the tip into the cuticle area first, then roll it down toward the free edge. Hold it five seconds. That’s what pushes the air out. Bubbles will quietly wreck a whole set so do not rush this bit. Catch a bubble? Pull the tip off and redo it right then, once it is cured under the lamp you are stuck with it.
7: Cure Each Hand for 60 Seconds
Whole hand goes inside the lamp. A full sixty seconds. That is what actually bonds the tip to your nail. Cut the curing time and you will see lifting by day two, trust me. Keep your fingers flat and spread out so every nail catches the light, curled fingers cure weird.
8: Shape, File, and Top Coat
File the free edge into whatever shape you are going for. Buff the surface so it is not tacky. Top coat gel on, cure for another 60 seconds, and you are done. File one direction only, none of that sawing back and forth, you will weaken the edge and it splits.
Gel Nail Extension Shapes That Suit Your Finger Length
Nobody talks about this and it kind of drives me nuts. Gel nail extension shapes completely change how your hand photographs. Pick one that suits your fingers, not whatever was trending on TikTok last week.
- Almond: slims out short, wide fingers
- Coffin or ballerina: looks chef’s kiss on long slim fingers, drowns short ones
- Square: pairs nice with short nail beds
- Stiletto: full drama, you need long fingers to pull it off
- Oval: the universal safe bet
- Round: the most natural everyday option
First time DIY? Pick oval or almond. Both file easy and forgive the wonky first try.
Best Soft Gel Nail Kit Picks for Beginners in 2026
These are the best soft gel nail kit options under $50 in the USA right now. All available on Amazon, Walmart, or direct from the brand.
- KISS Salon X-Tend: under $30 at Walmart and Target, the easiest first kit by far
- Peppi Gel Starter Kit: thousands of glowing reviews, holds up close to 3 weeks
- Revel Nail Soft Gel Tips: pre-etched so you can skip the filing step before application
- Dashing Diva GelXtend: solid drugstore pick, 60-second cure
- Aprés Gel-X: the OG, what every salon uses, costs more but lasts the longest
If drugstore beauty is your whole vibe, check the La Roche Posay vs CeraVe breakdown at La Roche Posay vs CeraVe breakdown
Why Your Soft Gel Tips Pop Off and How to Fix Lifting
Three reasons tips pop early. One, you skipped the alcohol wipe and your nail bed was oily. Two, gel touched your skin and broke the seal. Three, your lamp is weak and the gel never fully cured. Diagnose the cause, do not just glue it back blind.
Catching a lift mid-week? Do not peel. Seriously, do not. Clean the loose edge with alcohol, drop one bead of gel adhesive under there, press five seconds, cure 30 seconds. Crisis avoided.
How to Remove Soft Gel Nail Extensions at Home Safely
Bad removal wrecks your nails harder than the application ever could. The right way to take off soft gel nail extensions at home goes like this:
- File the top coat down with a 180 grit file
- Soak cotton balls in 100% pure acetone
- Press one cotton ball on each nail
- Wrap every finger in foil and wait 12 to 15 minutes
- Slide the softened gel off with a wooden pusher
- Light buff, then cuticle oil
Yet so many people get impatient and peel. Peeling rips layers off your real nail. The damage takes months to grow out. Just sit with the foils on and scroll your phone for fifteen minutes.
Aftercare Tips to Make Soft Gel Nail Extensions at home Last 4 Weeks
Cuticle oil twice a day, every day. Glove up for dishes. Stop using your nails as can openers, screwdrivers, or staple removers (you know who you are). Drop a fresh layer of clear gel top coat at week two and you will comfortably hit week four.
Final Thoughts on Soft Gel Nail Extensions at Home
Soft gel nail extensions at home save you real money, look genuinely natural, and outclass acrylic for first-timers. KISS Salon X-Tend is the easiest place to start. And prep matters way more than the actual application. Mess up the alcohol wipe and nothing else you do matters.
DaithPiercing drops new nail, skin, and beauty tutorials every week. Bookmark this one, send it to the friend who is still paying $90 a set, and start banking that $200 a year.
Frequently Asked Questions
How long do soft gel nail extensions at home last?
With decent prep and basic aftercare, soft gel nail extensions at home last 3 to 4 weeks. People who wash dishes constantly or hit the gym hard? Closer to two weeks. Desk job and cuticle oil habit? You can ride a set the full month, no problem.
Are soft gel nails better than acrylic for beginners?
Yes, by a wide margin. Soft gel is lighter, no chemical smell, and it soaks right off in acetone instead of needing an e-file. Beginners damage their real nails a lot less with soft gel, and the learning curve is shorter.
Can I do soft gel extensions without a UV or LED lamp?
Nope. Soft gel only hardens under UV or LED light. A 48-watt LED runs you about $25 on Amazon and handles every step in the process. Sunlight will not work. Do not even try.
Do I need to file my natural nails before applying soft gel tips?
Just buff off the shine. That is all. Heavy filing thins the nail plate and your tips will start lifting within five days. Light pass with a 180 grit, then move on.
What is the cheapest way to do soft gel nail extensions at home?
KISS Salon X-Tend kit at Walmart, under $30, covers everything. After the first kit, refill tips run $10 to $15 a set. A full year of wearing extensions weekly costs you less than two salon visits.