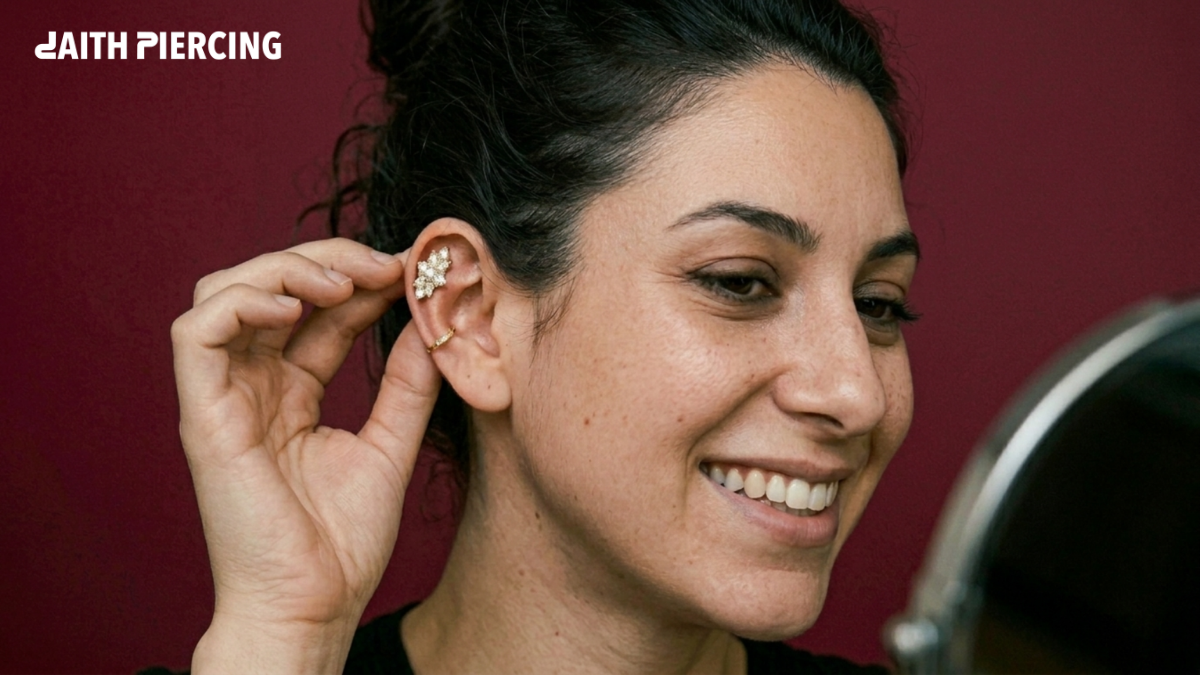
If you are feeling a knot of anxiety about your upcoming appointment, knowing exactly what to expect during the daith piercing procedure can turn that apprehension into confidence. At daithpiercing.io, our team has documented the entire daith piercing process so you can walk into the studio fully prepared.
This comprehensive guide breaks down the professional experience into four critical phases: initial preparation, the sterile station setup, the actual needle work, and what to monitor during the first hour after your jewelry is secured.
How is a daith piercing done?
The daith piercing procedure takes around 20 to 30 minutes total. It includes consultation, sterile setup, skin marking, clamp placement, needle insertion, and jewelry insertion. The actual piercing itself lasts only 6 to 9 seconds and is performed by a professional using a single-use hollow needle.
What Is the Daith Piercing Procedure?
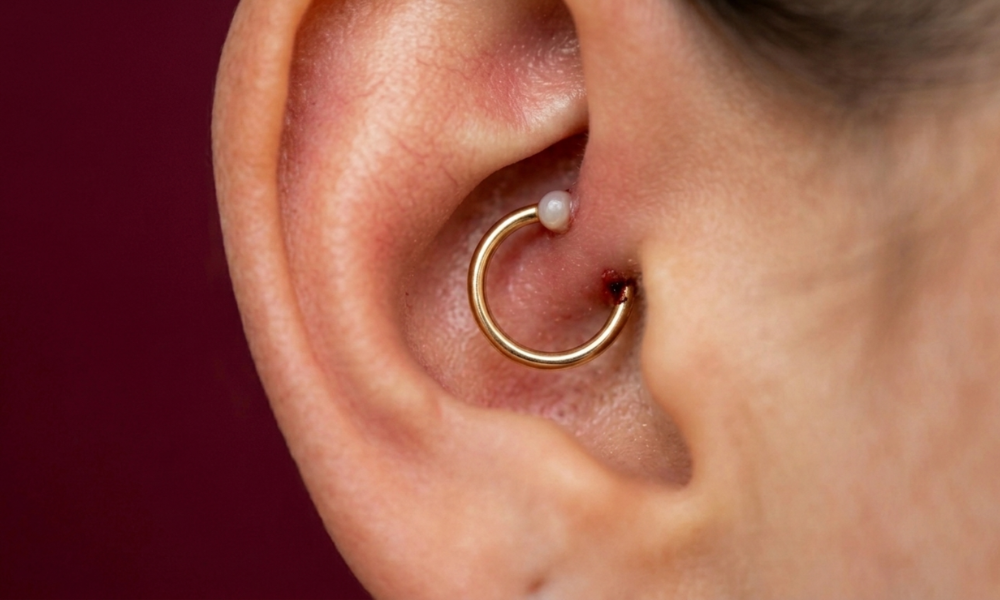
The daith piercing procedure is a controlled, sterile process performed on the innermost fold of ear cartilage, specifically the crus of the helix. Because of the cartilage thickness and the unique, curved anatomy of this area, the daith piercing technique is significantly more specialized than a standard lobe or outer helix pierce.
Understanding daith piercing how it is done involves recognizing that the piercer must navigate a tight, recessed space that requires high-level precision to ensure the jewelry sits flush against the ear. Unlike flatter areas of the ear, the daith requires a specific angle of entry to avoid putting pressure on the surrounding ridges, making it one of the most technical piercings to execute correctly.
-
Anatomy: Located on the bridge of cartilage just above the ear canal.
-
Difficulty: More complex than a standard helix due to the density of the cartilage and restricted access.
-
Professionalism: Should only be performed by a licensed professional piercer using a hollow needle.
-
Average US Cost: Typically ranges between $40 and $100, excluding the price of jewelry.
How Long Does the Daith Piercing Procedure Take?
If you are wondering how long does daith piercing procedure take, the total appointment usually runs between 20 to 30 minutes, though the actual piercing happens in just 6 to 9 seconds. Many people mistakenly only account for the moment the needle passes through, but the clinical preparation is what ensures a safe and successful result.
Below is the typical breakdown of your time in the chair:
| Stage | Time |
| Consultation and paperwork | 5–10 min |
| Sterile setup | 3–5 min |
| Skin marking | 2–3 min |
| Clamp placement | 1–2 min |
| Needle insertion | 6–9 sec |
| Jewelry insertion | 1–2 min |
| Cleanup and aftercare brief | 5 min |
Daith Piercing Preparation: What to Do Before Your Appointment
Proper piercing preparation is the foundation of a smooth experience and a faster healing journey. Whether you are a seasoned collector or a first-timer, preparing your body is essential because it directly impacts your pain threshold and blood clotting during the session.
Basically, a well-nourished and hydrated body manages the localized stress of a cartilage pierce much better than one running on empty. You should also consider the logistics of your physical appearance, so your piercer has unobstructed access to the target area without having to fight with hair or restrictive clothing.
24-Hour Daith Piercing Procedure Checklist
To ensure your body is in peak condition for the procedure, follow this essential checklist the day before and the morning of your visit:
-
Avoid alcohol, aspirin, and ibuprofen: These act as blood thinners and can lead to unnecessary bruising or bleeding during the pierce.
-
Eat a full meal 1-2 hours before: Maintaining stable blood sugar prevents the lightheadedness often associated with a sudden adrenaline rush.
-
Hydrate properly: Drink plenty of water to keep your skin and cartilage supple.
-
Wash ears and surrounding skin: Use a gentle, fragrance-free soap to ensure the area is clean before the professional sterilization begins.
-
Skip earbuds the night before: Avoid irritating the inner ear folds to keep the tissue calm and ready for the needle.
What to Wear and Bring
Planning your outfit and your bag can save you from discomfort once the jewelry is in place.
-
Loose top with a wide neckline: Avoid tight pullovers or hoodies that might snag your fresh piercing while you are getting dressed afterward.
-
Hair tied back or hair tie ready: Keeping hair away from the ear is vital for a sterile environment and clear visibility for the piercer.
-
Photo ID for studio paperwork: Most reputable US studios require a valid ID to verify age and consent.
-
Aftercare saline: While most studios sell this on-site, having a sterile saline spray ready at home is a proactive step for your recovery.
Daith Piercing Procedure: Step by Step Method
The daith piercing procedure is a highly technical medical-grade service that requires a specific sequence of actions to ensure safety and aesthetic precision. Following a daith piercing step by step protocol allows the professional to navigate the unique folds of the inner ear while maintaining a sterile field.
Step 1: Piercing Setup and Sterile Technique
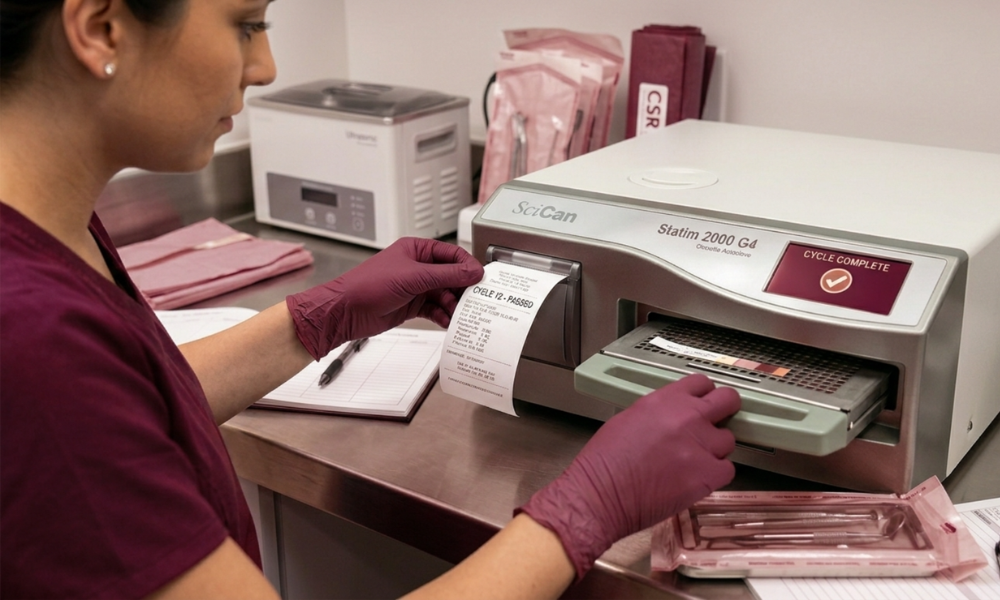
Every professional session begins with a rigorous piercing setup and the application of a strict sterile technique. To establish an authoritative environment, top-tier US studios utilize high-end autoclave sterilization units, such as Statim or Midmark sterilizers, to ensure all reusable tools are 100% free of pathogens.
Workstation Disinfection: The piercer performs a thorough wipe-down of all surfaces using a medical-grade disinfectant (tuberculocidal).
Aseptic Opening: All tools are removed from autoclave-sealed pouches directly in front of the client to verify they have not been tampered with.
Personal Protective Equipment: The piercer will don fresh, nitrile gloves, many studios will open these in your line of sight to build trust.
The Needle: A brand new, 18-gauge or 16-gauge hollow needle is used. These are single-use only and are disposed of in a biohazard sharps container immediately after the pierce.
Step 2: Skin Marking and Anatomy Check
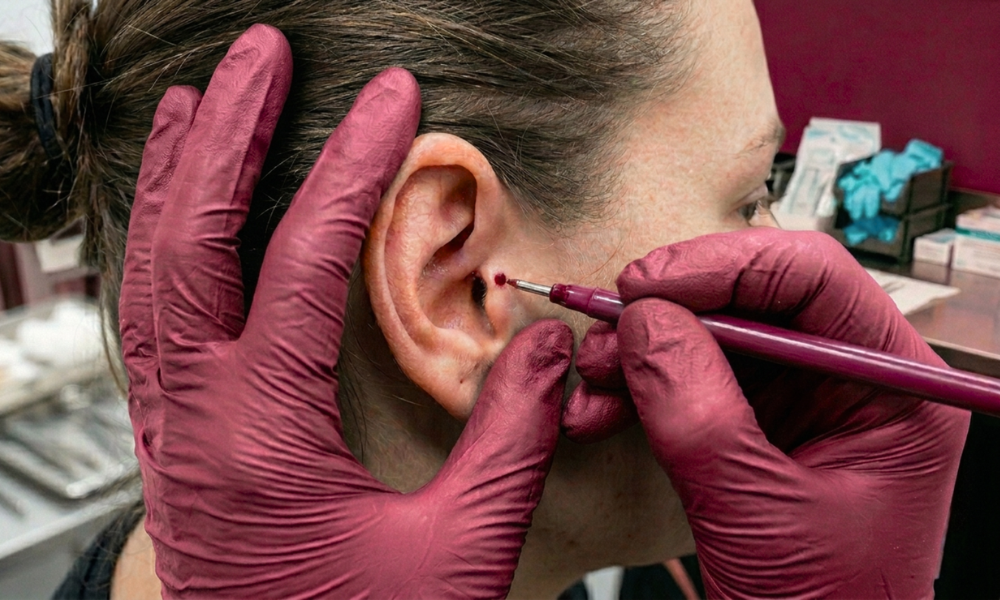
Precise skin marking is the next phase, serving as the blueprint for the entire procedure. Before any metal touches the skin, the piercer performs a final anatomy check to ensure the daith fold is deep and prominent enough to support the jewelry long-term without the risk of rejection.
Once the anatomy is confirmed, a sterile, surgical-grade marker is used to place dots on the entry and exit points of the crus of the helix. You will be given a hand mirror to check the placement. It is vital that you approve the look and positioning before the piercer proceeds to the next step.
Step 3: Clamp Placement
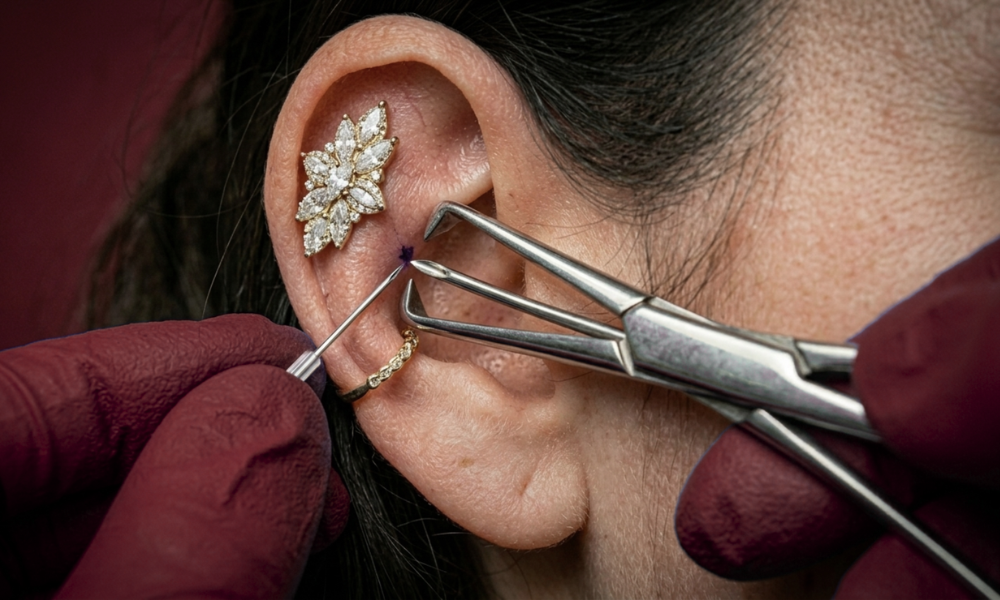
Proper clamp placement is utilized to stabilize the dense cartilage fold, ensuring the needle doesn’t slip during insertion. While some advanced piercers use a freehand technique, the use of sterile forceps or Pennington clamps is standard for reducing the risk of migration.
The pressure from the clamps often feels like a firm, steady pinch. While it may feel tight, it should not be painful, in fact, the pressure from the clamp often acts as a slight desensitizer for the nerves in the area, preparing the ear for the needle.
Step 4: Needle Insertion
The needle insertion is the quickest part of the process, typically lasting only 6 to 9 seconds. Your piercer will ask you to take a deep breath in and exhale as they perform a smooth, single push through the cartilage.
During this moment, it is very common to hear a crunch or pop”sound. This is a normal auditory side effect of a hollow needle passing through dense, healthy cartilage and does not indicate a tear or injury. Depending on your specific ear shape, a curved needle may be preferred to navigate the tight, recessed anatomy of the inner ear.
Step 5: Jewelry Insertion
Once the needle is through, jewelry insertion begins immediately. The starter jewelry is typically threaded through the end of the hollow needle (or a taper), allowing the jewelry to follow the needle out of the wound in one fluid motion.
Material Matters: We strictly recommend implant-grade titanium (ASTM F-136) or 14k gold for initial piercings to prevent allergic reactions.
Sizing for Swelling: The initial ring or barbell is sized slightly larger than the snug fit you might want later. This extra room is necessary to accommodate the natural swelling that occurs in the first two weeks.
The Downsize: You should schedule a follow-up appointment at the 4 to 8-week mark to downsize to a smaller piece of jewelry once the initial swelling has subsided.
Step 6: Final Cleanup and Aftercare Brief
The final stage involves a gentle saline wipe of the entry and exit points to remove any small amounts of blood or marking ink. Once the area is clean, your piercer will provide a verbal aftercare walkthrough, explaining how to clean the site without irritating it. You will leave with an aftercare card and a recommendation for a specific sterile saline spray to use twice daily at home.
What Happens During a Daith Piercing Appointment
Understanding what happens during a daith piercing appointment covers the essential logistics beyond the needle. Before the procedure, you will complete consent forms and a medical history check. A professional anatomy assessment follows; not every ear can safely support a daith, and a pro will tell you if yours is not suitable.
You will then have a jewelry consultation to select the correct gauge and material (aim for implant-grade titanium). After the pierce, payment and tip etiquette in the US typically suggests a 15–20% tip for your piercer’s expertise. Finally, you will receive an aftercare brief and an optional recommendation for sterile saline products to ensure a smooth recovery.
Daith Piercing Procedure Video Step by Step: What to Watch Before You Go
Watching a daith piercing procedure video step by step is an excellent way to demystify the process before your visit. To ensure you’re viewing safe practices, look for demos by APP-certified (Association of Professional Piercers) piercers on YouTube.
Avoid videos showing red flags like the use of piercing guns, ungloved hands, or cluttered workstations. A high-quality, professional demo should clearly feature a sterile field, calm pacing, and tools being removed from single-use packaging.
We recommend embedding a vetted procedure video directly on your page; this multimedia approach signals to search engines that your content provides a comprehensive, high-authority resource for users.
Daith Piercing Technique: How It’s Done Right vs Wrong
Mastering the correct daith piercing technique is what separates a smooth healing process from a potential medical complication. When researching daith piercing how it’s done, being able to distinguish between a professional studio and a subpar one is critical for your safety.
Red Flags: How It’s Done Wrong
If you notice any of these signs, leave the studio immediately:
-
Uses a piercing gun: These should never be used on cartilage; they cause blunt force trauma and cannot be properly sterilized.
-
Skips the autoclave step: Instruments should always come from a specialized sterilizer.
-
Refuses to show sealed needles: Professionals always open single-use packaging in your presence.
-
Marks placement without a mirror check: You must approve the blueprint before the needle is used.
-
Pushes mystery-metal jewelry: Cheap alloys often contain nickel, which causes severe irritation.
Green Flags: How It’s Done Right
-
APP-certified: The piercer is a member of (or trained under) the Association of Professional Piercers.
-
Transparent communication: They walk you through every step of the procedure.
-
High-quality materials: They exclusively use implant-grade titanium or 14k gold.
-
Ongoing care: They offer a scheduled downsize appointment to swap for a shorter post once swelling drops.
Right After the Daith Piercing Procedure: The First 24 Hours
The moments immediately following your appointment are critical for setting the stage for long-term healing. The first 24 hours involve specific physiological responses that can be startling if you aren’t prepared.
| Time After Pierce | What to Expect |
| 0–1 hour | Mild throbbing and light spotting/bleeding are normal. |
| 1–6 hours | Swelling usually peaks; you may feel warmth and a dull ache. |
| 6–12 hours | Lymph fluid (clear or pale yellow) may begin to form crusts. |
| 12–24 hours | Soreness fades when left alone; localized tenderness remains. |
Conclusion
The daith piercing procedure is a fast, controlled, and safe experience when performed by a professional using a rigorous sterile technique and single-use needles. While the technical nature of the inner ear requires precision, walking in with a clear understanding of each step significantly reduces appointment anxiety.
For more in-depth resources on healing timelines, aftercare routines, or the latest research on migraine relief, return to daithpiercing.io. Ready to learn more? Check out our daith pain scale guide or our comprehensive aftercare guide to ensure your new piercing heals perfectly.
Frequently Asked Questions
How painful is the daith piercing procedure?
Most clients rate the pain level between a 6 and 7 out of 10. While the sensation is more intense than a lobe pierce due to the thickness of the cartilage, the actual pinch lasts only 6 to 9 seconds.
Can I numb my ear before the daith piercing procedure?
Some piercers allow a topical lidocaine cream applied 30 to 60 minutes prior, but you must confirm with your studio first. Many professionals prefer natural skin because numbing agents can occasionally cause the tissue to swell or stiffen, potentially affecting marking precision and the final angle of the pierce.
Is the daith pierced with a needle or a gun?
A professional daith is exclusively performed with a hollow, single-use needle. Piercing guns use blunt force that can shatter cartilage and are impossible to fully sterilize, making them unsafe for this procedure.
How long does the daith piercing procedure take from start to finish?
The total appointment runs 20 to 30 minutes, covering paperwork, jewelry selection, and sterilization. The actual piercing and jewelry insertion are remarkably fast, typically completed in under 10 seconds.
Can I drive home right after my daith piercing appointment?
Yes, most people drive home without issue. However, if you feel lightheaded due to a sudden adrenaline drop a common reaction called vasovagal syncope wait 10 to 15 minutes in the studio lobby and have a sugary snack or water before getting behind the wheel.