Quick Answer
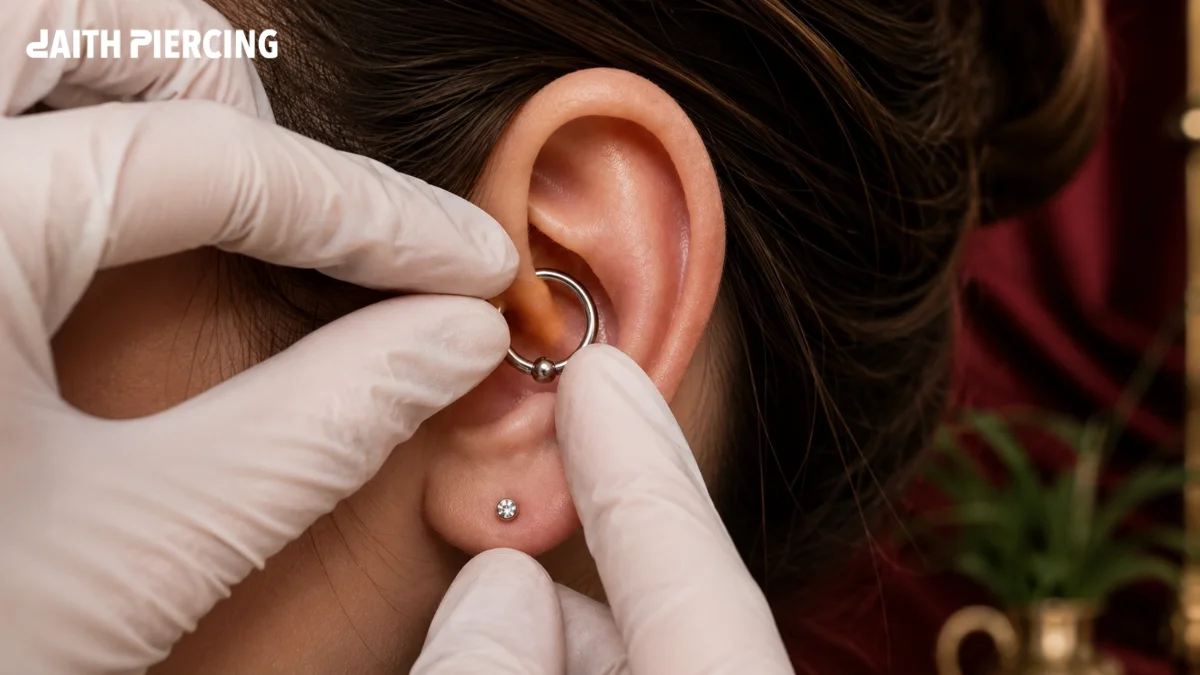
To open a captive bead ring daith safely, wash your hands, clean the jewelry, and gently twist the ends sideways instead of pulling them apart. Remove the bead once the tension is released, then carefully rotate the ring through the piercing. If the ring feels too tight, use ring-opening pliers made for body jewelry instead of forcing it.
What Is a Captive Bead Ring?
A captive bead ring, often called a CBR, is a circular piece of body jewelry that holds a small bead between the ends of the ring. The bead stays in place because of the pressure created by the ring itself rather than threads or hinges.
This design has been used in body piercings for many years because it is simple, secure, and suitable for different piercing locations. Daith piercings are one of the most common places where captive bead rings are worn, especially during healing.
Unlike a clicker ring, there are no moving parts that snap open. Instead, you remove the bead first before taking out the ring.
Why Captive Bead Rings Are Popular for Daith Piercings
Many professional piercers recommend captive bead rings because they stay secure during everyday activities. Once the bead is properly fitted, it is unlikely to fall out on its own.
Another reason for their popularity is the smooth design. There are no hinges or threaded sections that pass through the piercing channel, which can make the jewelry comfortable for many wearers.
Some of the biggest advantages include:
| Benefit | Why It Matters |
|---|---|
| Secure fit | Helps prevent accidental jewelry loss |
| Smooth surface | Comfortable during healing |
| Classic appearance | Matches many personal styles |
| Available in many materials | Easy to find titanium, surgical steel, and gold options |
| Multiple sizes | Suitable for different ear shapes |
How a Captive Bead Ring Works
Understanding how the jewelry functions makes changing it much less stressful.
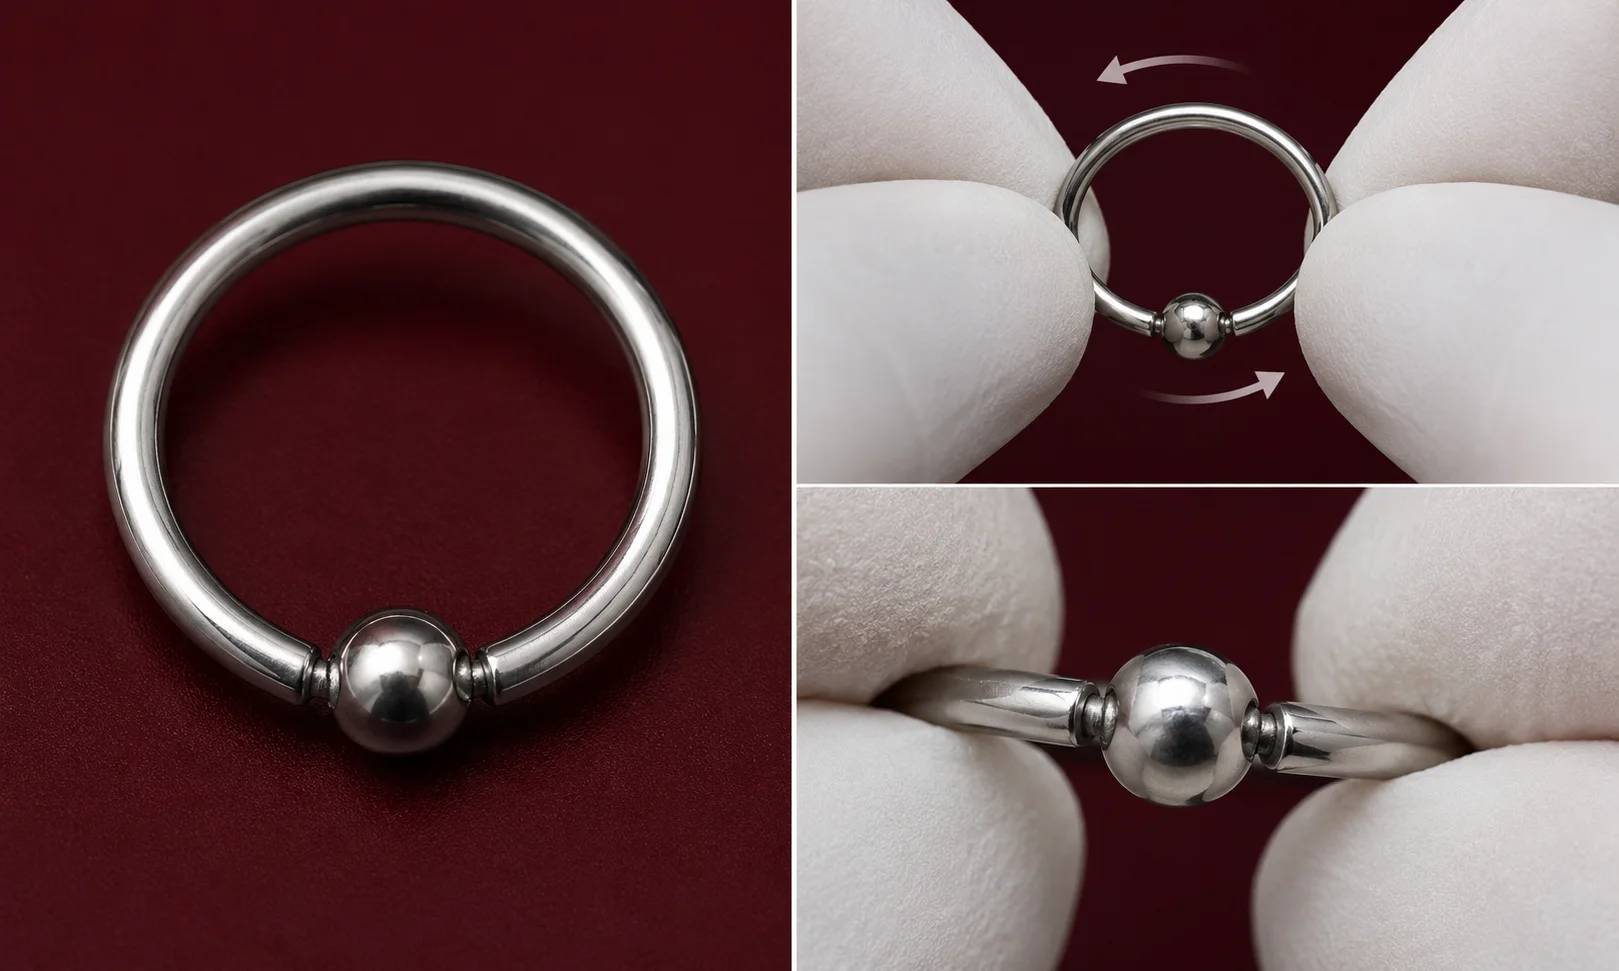
The ring forms a nearly complete circle with a small gap between the ends. A bead sits inside that gap and has tiny dimples on each side. These dimples grip the ends of the ring through pressure, creating a secure hold.
Instead of opening like a clasp, the ring slightly twists to release the bead. After the bead is removed, the opening becomes wide enough for the jewelry to rotate out of the piercing.
Many beginners make the mistake of pulling the ring outward. This can permanently change its shape, making it difficult for the bead to stay secure later.
The correct movement is always a gentle sideways twist.
Tools You May Need
Many people can remove a loose captive bead ring using only clean hands. However, some rings are designed with stronger tension and may require a specialized tool.
| Tool | Purpose | Recommended |
|---|---|---|
| Clean disposable gloves | Better grip on jewelry | Yes |
| Sterile saline solution | Cleans the piercing | Yes |
| Ring opening pliers | Opens tight rings safely | Yes |
| Small mirror | Improves visibility | Yes |
| Soft towel | Prevents losing the bead | Yes |
Avoid using regular household pliers. They can scratch the jewelry, damage protective coatings, or create sharp edges that may irritate your piercing.
Before You Open the Ring
Taking a few minutes to prepare can make the entire process smoother and reduce the chance of irritation.
Wash Your Hands
Always wash your hands thoroughly with soap and warm water. Dry them using a clean towel before touching your jewelry.
Clean the Jewelry
If possible, rinse the area with sterile saline solution. This removes dried discharge and makes the ring easier to handle.
Check Whether Your Piercing Has Healed
Changing jewelry too early can slow healing and increase discomfort.
Most daith piercings need several months to heal completely. If your ear still feels tender, swollen, or produces discharge, it’s usually best to wait or visit a professional piercer.
Prepare Your Workspace
Choose a bright room with a mirror. Place a towel on the counter or table beneath you so the bead cannot roll away if it drops.
How to Open a Captive Bead Ring
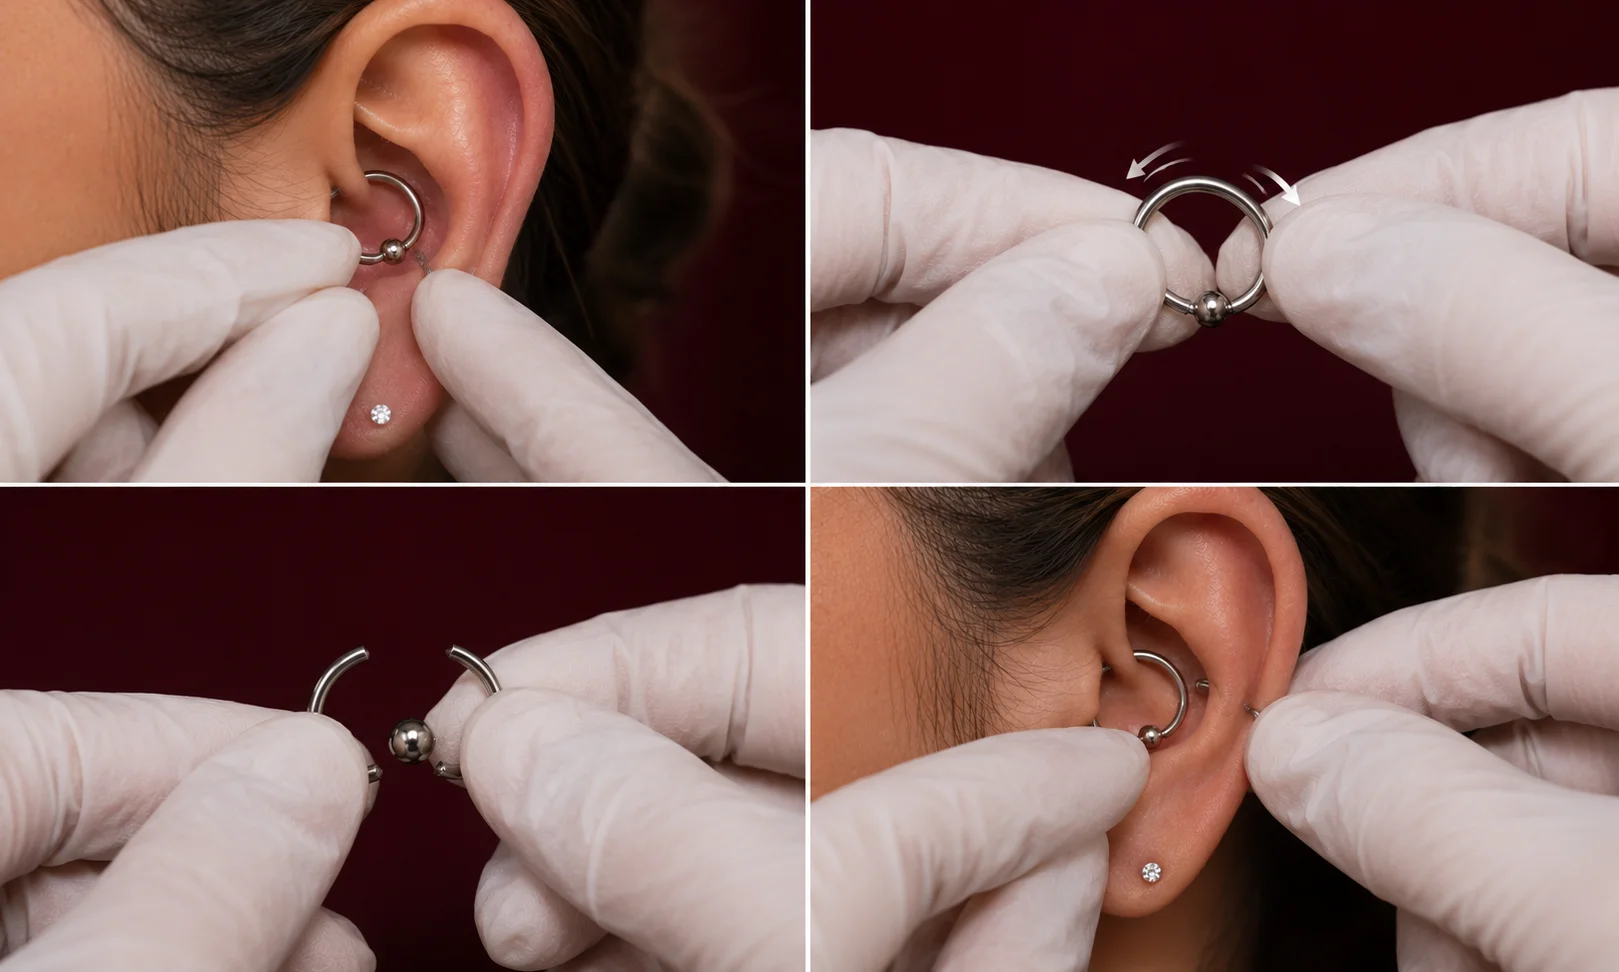
Follow these steps carefully to avoid bending the jewelry.
Step 1: Hold the Ring Securely
Grip the ring firmly on both sides of the bead. Wearing disposable gloves can improve your grip if the jewelry feels slippery.
Step 2: Twist Sideways
Apply gentle pressure by twisting one end slightly forward while moving the opposite end slightly backward.
Do not pull the ring apart. Twisting preserves its circular shape and helps maintain the tension needed to hold the bead later.
Step 3: Remove the Bead
As the pressure releases, the bead should come free with minimal effort.
Place it somewhere safe immediately since it is small and easy to lose.
Step 4: Rotate the Ring Out
Slowly rotate the opening through your daith piercing until the ring slides out naturally.
If you feel sharp pain or significant resistance, stop instead of forcing the jewelry. A stubborn ring is often easier for a professional piercer to remove safely.
How to Close a Captive Bead Ring
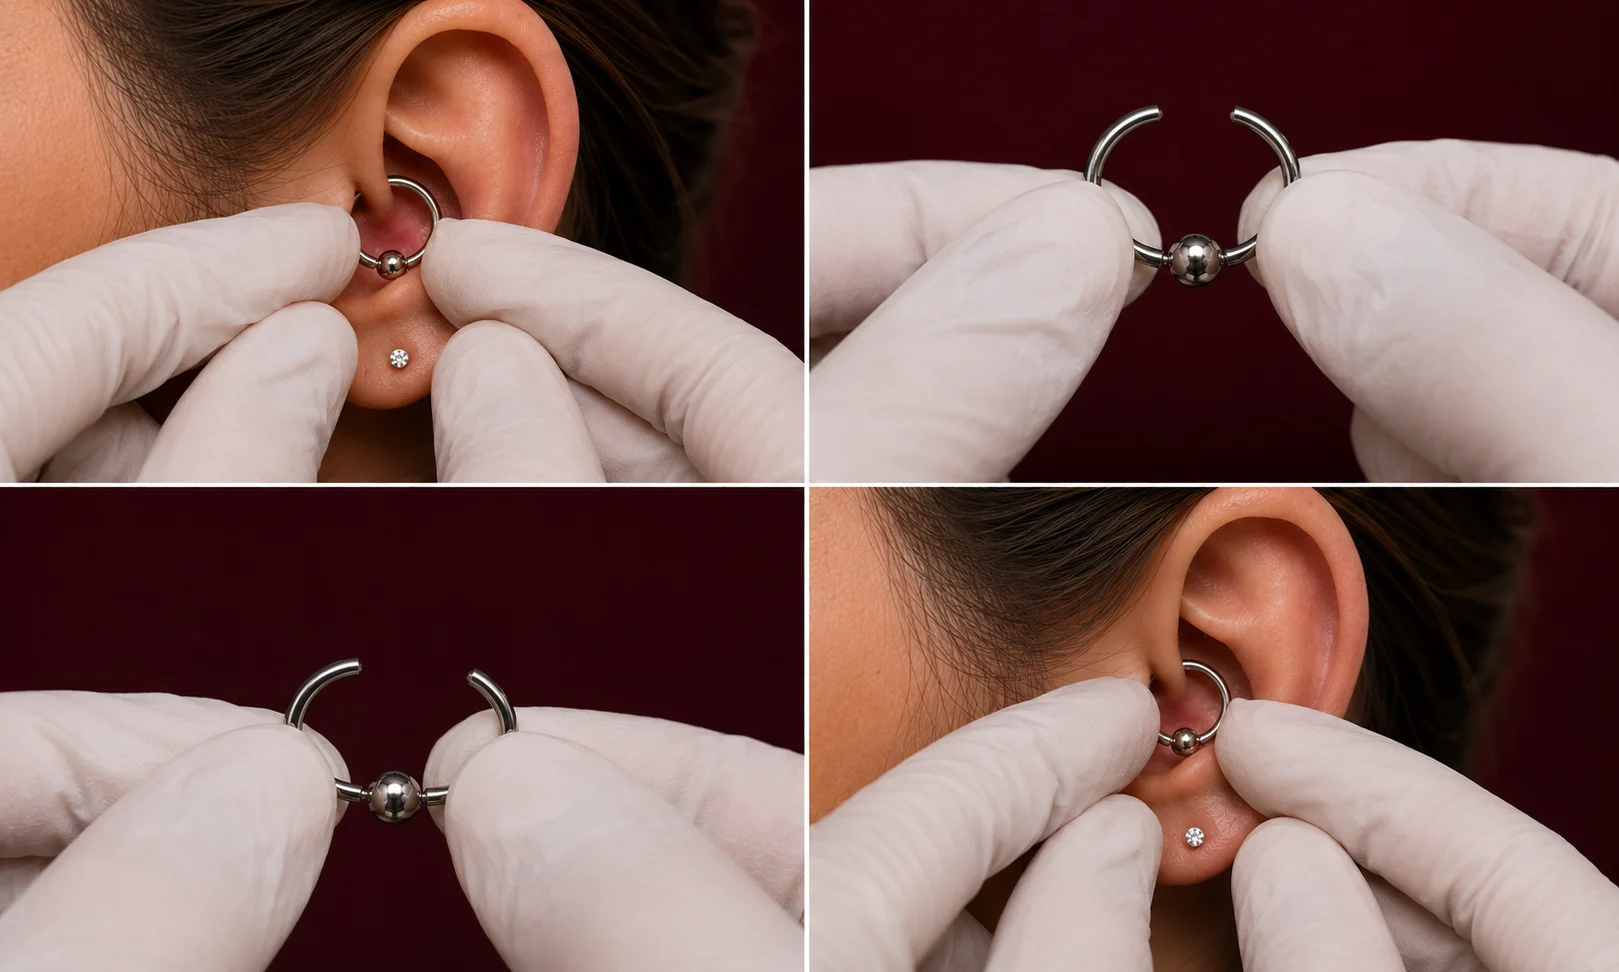
Putting the ring back together is often more challenging than opening it. The bead needs to fit securely between both ends of the ring without forcing it into place.
Step 1: Insert the Ring
Carefully guide the open end of the ring through your daith piercing. Rotate it slowly until the opening sits where you can comfortably reach it.
If the jewelry doesn’t slide through easily, don’t push harder. A small amount of saline can help reduce friction, but never force the ring through the piercing.
Step 2: Position the Bead
Look closely at the bead. Most captive beads have tiny indentations on opposite sides that fit onto the ends of the ring.
Hold the bead between your fingers and line up both dimples with the ring ends.
Step 3: Twist the Ring Back
Gently twist the ring back toward its original position. Avoid squeezing the ring inward because this can change its shape.
Once the ends are aligned, the bead should snap into place using the ring’s natural tension.
Step 4: Check the Fit
Rotate the jewelry slightly.
The bead should stay firmly in place while the ring moves smoothly inside the piercing. If the bead feels loose, remove it and realign the ring before trying again.
How to Change a Captive Bead Ring Without Pliers
Many people can change their jewelry without special tools, especially if the ring has been opened before.
Here’s what usually works best:
- Wear clean disposable gloves for extra grip.
- Twist the ring sideways instead of pulling it apart.
- Work in front of a mirror with good lighting.
- Place a towel underneath to catch the bead if it falls.
If the ring refuses to move, stop trying. Excessive force can bend the jewelry or injure your ear.
Common Problems and How to Fix Them
Changing a captive bead ring isn’t always straightforward. Fortunately, most issues have simple solutions.
| Problem | Possible Cause | Solution |
|---|---|---|
| Ring won’t open | Tension is too strong | Use ring opening pliers or visit a piercer |
| Bead won’t stay in | Ring lost its tension | Twist the ring back slightly or replace it |
| Ring feels bent | Pulled apart instead of twisted | Replace the jewelry if it won’t hold the bead |
| Piercing hurts | Piercing isn’t fully healed | Wait until healing is complete before changing jewelry |
| Can’t insert the ring | Incorrect angle | Rotate the ring slowly instead of pushing |
| Lost the bead | Small parts are easy to misplace | Buy a replacement bead that matches the gauge and diameter |
Captive Bead Ring vs Clicker Ring
Many people switch to a clicker ring after their daith piercing heals. Both styles have benefits, but they suit different needs.
| Feature | Captive Bead Ring | Clicker Ring |
|---|---|---|
| Easy to open | Moderate | Very easy |
| Secure fit | Excellent | Very good |
| Beginner friendly | Moderate | Excellent |
| Requires tools | Sometimes | Rarely |
| Risk of losing small parts | Yes | No |
| Best for healing | Often recommended | Usually after healing |
| Cleaning | Easy | Easy |
If you change your jewelry regularly, a clicker ring may feel more convenient. However, many people still prefer a captive bead ring because of its classic appearance and secure fit.
Expert Tips for Easier Jewelry Changes
Small habits can make changing your daith jewelry much easier.
- Change your jewelry after a warm shower when the skin feels more relaxed.
- Always wash your hands before touching the piercing.
- Work slowly and never rush the process.
- Use a magnifying mirror if visibility is poor.
- Keep a spare bead in case one gets lost.
- Store jewelry in a clean container when it’s not being worn.
- If you’re unsure, let a professional piercer change the jewelry.
Common Mistakes to Avoid
Many problems happen because people rush or use the wrong technique.
- Pulling the ring apart instead of twisting it.
- Using household pliers that scratch the jewelry.
- Changing jewelry before the piercing has healed.
- Forgetting to clean the jewelry first.
- Opening the ring wider than necessary.
- Working over a sink where the bead can disappear.
- Forcing the ring through the piercing.
- Ignoring pain or swelling during the process.
Avoiding these mistakes helps protect both your jewelry and your piercing.
Quick Checklist
Before changing your captive bead ring, make sure you can answer yes to each point.
| Checklist | Yes |
|---|---|
| My daith piercing is fully healed | ✓ |
| My hands are clean | ✓ |
| The jewelry is clean | ✓ |
| I have good lighting | ✓ |
| I have a towel to catch the bead | ✓ |
| I know how to twist the ring correctly | ✓ |
| I’m not forcing the jewelry | ✓ |
Frequently Asked Questions
Can I change my daith captive bead ring myself?
Yes, but only if the piercing has fully healed. If you’re unsure or the ring feels stuck, it’s safer to visit a professional piercer.
Do I need ring opening pliers?
Not always. Many captive bead rings can be opened by hand. Tighter rings may require ring opening pliers to avoid bending the jewelry.
Why won’t my captive bead ring close?
The ring may have lost its tension, or the bead may not be aligned with the dimples. Reposition the bead and gently twist the ring back into shape.
Can opening the ring damage it?
Yes. Pulling the ring outward repeatedly can weaken the metal and prevent the bead from fitting securely. Always twist the ends sideways.
What material is best for a daith piercing?
Implant-grade titanium is widely recommended because it is lightweight, durable, and suitable for sensitive skin. High-quality surgical stainless steel is another popular choice.
Conclusion
Learning how to open and close a captive bead ring daith becomes much easier once you understand how the jewelry is designed. The most important rule is to twist the ring sideways rather than pulling it apart. This keeps the ring in shape and allows the bead to fit securely when you’re finished.
Take your time, work with clean hands, and use the right tools if needed. If the jewelry feels unusually tight or your piercing becomes painful, don’t force it. A professional piercer can remove or replace the ring safely without damaging the piercing.