As the curated ears phenomenon continues to dominate social media, the conch piercing has cemented its position as a must-have for 2026. But this exhaustive deep-dive at daithpiercing.io fills in the blanks on what it’s actually like to live with this bold cartilage mod. Many guides will cover the basics. The conch piercing, situated in the center cup of the ear, offers a flexible choice that combines a cool edge with a dash of class.
From tiny studs to big hoops, we understand the real-world pain, healing and jewelry secrets that no one else does.
What Is a Conch Piercing? And Why It is Taking Over Ear Stacks
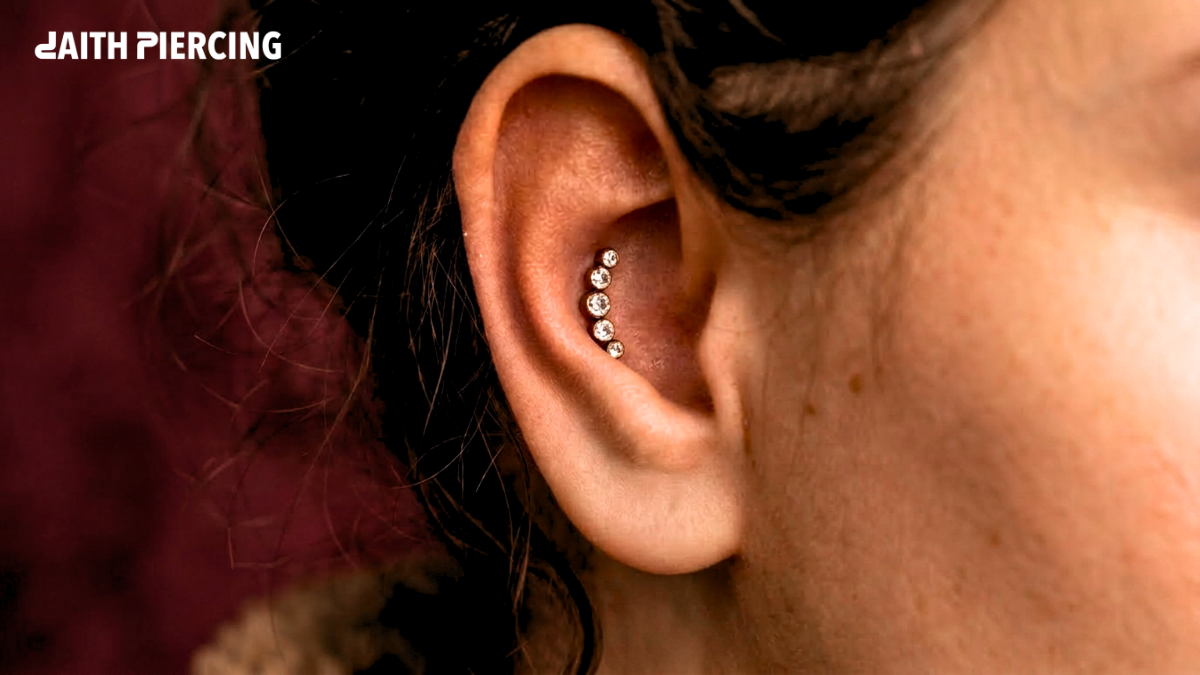
A conch piercing is a piercing of the large bowl-shaped area of cartilage that forms the center of the ear, known anatomically as the concha. This piercing has exploded in popularity because it is the anchor of a curated ear, giving a central focal point to tie together lobe and helix arrangements.
You can choose between an inner conch (located in the upper flat area) or an outer conch (located in the lower bowl) depending on your anatomy and style. This has become a staple in contemporary ear stacks because of its versatility from dainty sparkly studs to big, wrap-around hoops that create a high-impact look.
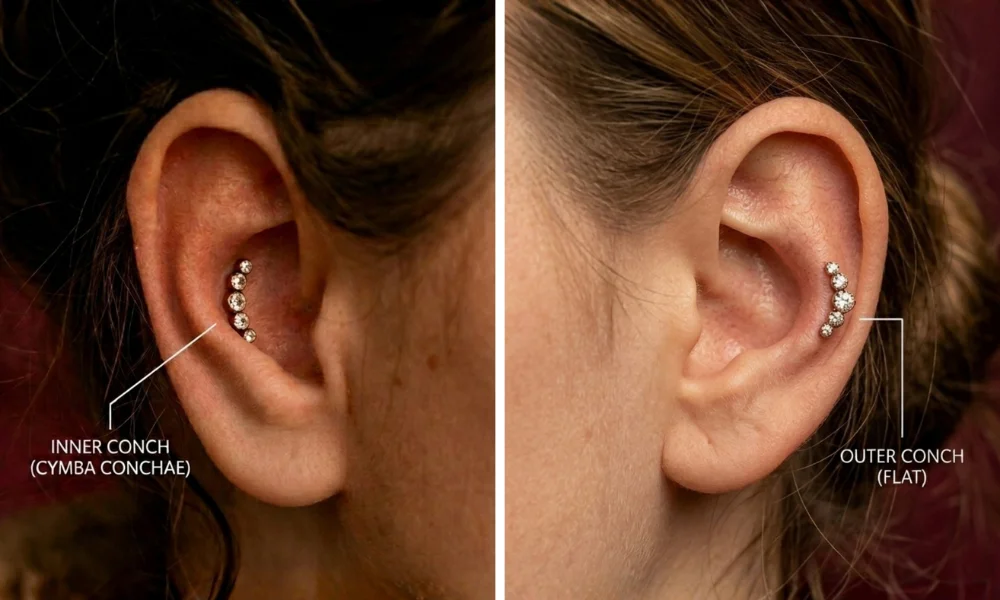
Inner Conch Piercing vs. Outer Conch Piercing: Which One Should You Actually Get?
Choosing between an inner conch and an outer conch is not just about the name; it is about the real estate of your ear and your long-term jewelry goals. This choice defines the entire silhouette of your ear stack.
Inner vs. Outer Conch: Quick Comparison
| Feature | Inner Conch Piercing | Outer Conch Piercing |
| Location | The deep, central bowl near the ear canal. | The flatter, upper ridge near the helix. |
| Best Jewelry | Flatback studs, labrets, and clusters. | Hoops, seamless rings, and clickers. |
| Anatomy | Fits almost every ear shape. | Requires a defined ridge for hoops to sit well. |
| Vulnerability | Low (tucked away from hair/glasses). | High (prone to snagging on masks or hair). |
| Aesthetic | Subtle, sophisticated, centered. | Bold, edgy, high-impact. |
| Healing Difficulty | Moderate (depth makes cleaning tricky). | Moderate (pressure from hoops can cause bumps). |
How Much Does a Conch Piercing Hurt?
When it comes to conch piercing pain, most enthusiasts rank it at a solid 5 to 7 out of 10. Unlike the concha, the fleshy lobe is made of thick dense cartilage. Because this tissue is less vascular and more rigid, the needle has to exert more pressure to pass through, resulting in a sharp crunch or intense pressure followed by a dull throb.
The initial pinch lasts seconds but the recovery is a lingering soreness. The more substantial the cartilage in your particular ear bowl, the more powerful the initial impression will be.
Conch Piercing with a Needle vs. Dermal Punch: The Real Difference
For those looking for a larger gauge right away, the choice between a standard needle and a dermal punch is a major decision.
-
The Needle Method: This is the standard approach. A hollow piercing needle displaces the tissue to make room for jewelry. It is less painful and allows the hole to shrink or close if you ever decide to remove the piercing.
-
The Dermal Punch: This method actually removes a circular plug of cartilage. While it sounds more intense, some enthusiasts claim the pain is more dull than the sharp sting of a needle. However, the conch healing time for a punch can be significantly longer.
-
Permanence & Legality: A dermal punch is permanent; because the cartilage is physically removed, the hole will not close on its own. It is also important to note for this choice: dermal punching is considered a minor surgical procedure in several US states and is often restricted to highly specialized studios or even prohibited for standard piercers in certain jurisdictions.
How Long Does a Conch Piercing Take to Heal?
If done with a standard needle, a conch piercing can take 6 to 12 months to completely heal. Choosing a dermal punch means the healing process will take over a year. The concha is made of dense cartilage, with poor blood supply, unlike earlobes which have excellent blood supply, thereby greatly reducing the body’s ability to regenerate tissue and combat potential irritants.
It is not uncommon to get the false heal where the piercing looks and feels good on the surface after 8 weeks, but the fistula internally is still fragile. The main cause of irritation bumps and setbacks is early jewelry changes so it is important to follow a strict aftercare routine until the internal tract is fully mature to ensure a successful conch healing time.
Conch Piercing Aftercare: The Full Routine
Proper aftercare is the difference between a stunning ear stack and a year of frustration. To ensure your conch piercing heals without complications, follow this streamlined, professional routine:
- Saline Cleanse (2x Daily): Use a sterile saline spray (0.9% sodium chloride) to gently mist the front and back of the piercing. Pat dry with non-woven gauze avoid cotton balls, as fibers can snag.
- The Shower Rinse: Let warm water run over the area for 30 seconds to soften and flush away crusties without manual scrubbing.
- Hands-Off Policy: Never touch or rotate the jewelry. Moving the post tears the fragile new tissue forming inside.
-
What to Avoid:
- Submerging: No pools, hot tubs, or lakes for at least 8–12 weeks.
- Harsh Chemicals: Avoid alcohol, peroxide, or tea tree oil; these kill healthy cells and delay healing.
- Earbuds: During the first 4–6 weeks, avoid over-ear headphones or tight earbuds that put pressure on the concha.
How to Sleep With a Conch Piercing Without Ruining It
Sleeping is the number 1 cause of conch piercing migration and those dreaded irritation bumps. Because the concha is a thick piece of cartilage, constant pressure from your head’s weight can actually shift the angle of the piercing permanently.
The Donut Strategy: The most effective way to sleep on your side is to use a travel pillow or a dedicated piercing pillow with a hole in the center. Position your ear in the hole so it floats without touching the fabric. This prevents the jewelry from being pushed forward, which is the primary trigger for hypertrophic scarring.
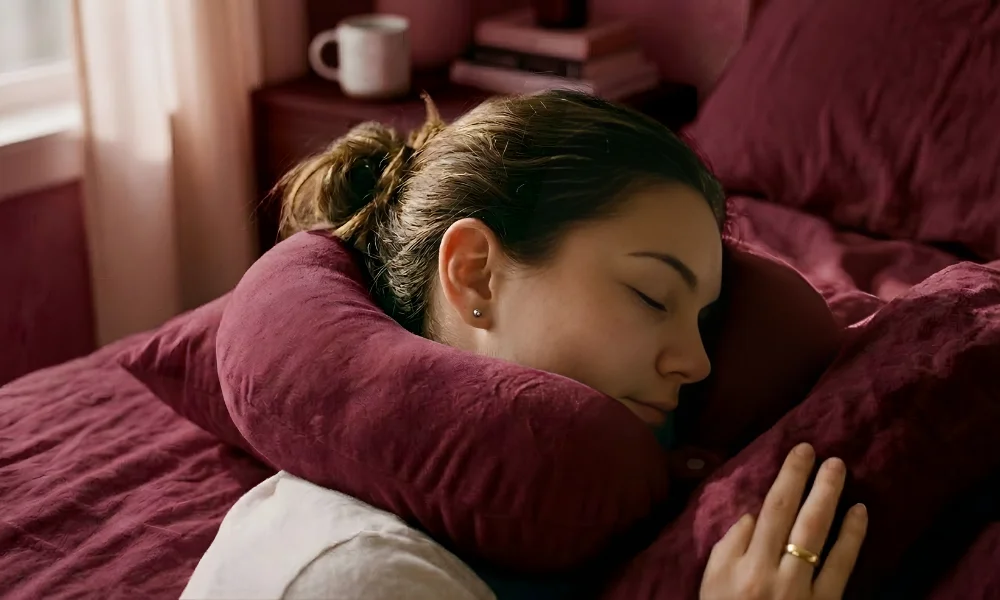
When is it safe to sleep on it? Do not attempt to sleep directly on the ear for at least 4–6 months. Even if it feels fine, the pressure can restrict blood flow to the area, causing a flare-up. If you must sleep on that side, ensure your jewelry is downsized by a professional piercer first to minimize leverage and movement.
Conch Piercing Bump: What It Is and How to Fix It
Finding a small, raised lump near your jewelry can be alarming, but a conch piercing bump is a common hurdle in the cartilage healing journey. Most bumps are not permanent; they are the body’s way of signaling that the area is under stress. Whether it is from accidental snagging or a lingering moisture problem, identifying the root cause is the first step toward clearing it up.
Pressure Bump vs. Keloid vs. Hypertrophic Scar: How to Tell the Difference
Distinguishing between these three is vital for proper treatment, as they require very different approaches:
Pressure Bumps: These are the most common. They are usually small, flesh-colored or slightly red, and caused by physical irritation like sleeping on your ear or wearing a hoop too early. They often fluctuate in size and disappear once the irritation stops.
Hypertrophic Scars: These are raised, firm tissues that stay within the boundary of the piercing site. They usually result from chronic trauma or a poor piercing angle.
Keloids: Often confused with standard bumps, keloids are a genetic condition where scar tissue grows far beyond the original wound. They are rare, often dark or purple, and usually require a dermatologist’s intervention. If you have a history of keloids on other parts of your body, consult a professional before getting a conch piercing.
How to Clear a Conch Piercing Bump
If you notice an irritation bump, your body is likely reacting to a specific trigger. Use the table below to identify the issue and apply the correct fix.
| The Symptom | Likely Cause | The Professional Fix |
| Small, red bump that leaks clear fluid | Friction or snagging | Switch to a shorter titanium post (downsizing) to stop the jewelry from sliding. |
| Firm, flesh-colored bump on one side | Pressure (usually from sleeping) | Use a piercing pillow, ensure you aren’t resting your head directly on that ear. |
| Dry, crusty, and itchy bump | Over-cleaning or harsh products | Stop using soaps or oils; stick strictly to 0.9% sterile saline spray twice daily. |
| Localized swelling and heat | Bacteria or dirty hands | Increase hygiene; if the ear becomes throbbing or hot, see a doctor for potential infection. |
| Persistent, growing purple/dark tissue | Genetic Keloid | Seek a consultation with a dermatologist, standard aftercare will not resolve a true keloid. |
Conch Piercing Jewelry: The Ultimate Buyer’s Guide
Choosing your jewelry is the most exciting part of the process, but the wrong pick can derail your healing for months. At daithpiercing.io, we recommend a Safety First, Style Second approach.
1. Top Styles for the Perfect Ear Stack
-
Flatback Studs (Labrets): The Gold Standard for initial piercings. The flat back prevents the jewelry from poking the side of your head and minimizes movement.
-
Seamless & Hinged Rings: These create the iconic “hoop” look that wraps around the ear’s outer edge. Note: Save these for the 6-month mark!
-
Curved Barbells: Occasionally used for specific anatomical fits, offering a slightly edgier, industrial aesthetic.
2. Recommended Gauge and Sizing
The standard conch piercing is usually done with a 16g (1.2mm) needle. This thickness is ideal because it’s sturdy enough to prevent migration (the jewelry moving through the ear) but thin enough to look delicate. If you opted for a dermal punch, your gauge will be much larger ranging from 10g to 0g depending on your goals.
3. The Safe Metal Tier List
Not all metals are created equal. To avoid the dreaded conch piercing bump, stick to these materials:
| Metal Type | Status | Why it Matters |
| Implant-Grade Titanium | Best Choice | Nickel-free, hypoallergenic, and extremely lightweight. |
| 14k / 18k Solid Gold | Premium | Biocompatible and stylish. Ensure it is solid gold, not plated. |
| Niobium | Safe | Great for those with extreme metal sensitivities; very soft for rings. |
| Surgical Steel | Use Caution | Only use 316LVM grade. Lower grades contain nickel that causes itching. |
| Fashion Alloys | Avoid | Often found in fast-fashion shops; these can cause green skin and infections. |
How Much Does a Conch Piercing Cost in 2026?
Budgeting for your new look? Here is the breakdown of what you can expect to pay at a reputable studio:
The Piercing Fee: $40 – $70 (Covers the professional’s time and sterilization).
Initial Jewelry: $30 – $60 (For basic titanium) or $100+ (For gold/gemstones).
Aftercare Supplies: $10 – $15 (For sterile saline spray).
Total Investment: Expect to spend between $80 and $150 for a high-quality experience. Remember, a cheap piercing often leads to expensive medical bills later invest in a pro.
Conch Piercing Migration and Rejection: Warning Signs to Watch
Whereas cartilage piercings have been found to have lower chances of being rejected as compared to surface piercings, it would be wrong for one to think that they are immune to rejection. While migration happens when your conch piercing moves away from its original position because of inappropriate jewelry size or the pressure caused by sleeping on it, rejection refers to the process where your body will treat your piercing jewelry as foreign and hence push it towards the surface.
Signs That You Are Experiencing a Rejection:
- The jewelry seems to be protruding towards the surface more than before.
- Skin thinning and increased visibility of the piercing site.
- Localized redness that cannot be explained by normal infection.
In case you notice any of these signs, don’t ignore the situation or try to let it go. Consult an expert piercer to see whether downsizing the jewelry might solve your problem.
Conclusion
The conch piercing is arguably the most versatile ear modification available in 2026. Whether you opt for the subtle elegance of an inner conch stud or the bold statement of an outer conch hoop, it provides a central anchor that elevates any ear stack. While the conch healing time requires patience and a strict aftercare routine, the results are a timeless, high-impact aesthetic.
Ready to start your curated ear journey? Head over to daithpiercing.io for more expert guides on jewelry selection and piercing safety. Remember, respect the healing process, invest in quality metals, and your conch piercing will be a centerpiece of your style for years to come.
Frequently Asked Questions
Does a conch piercing hurt more than a helix?
Generally, yes. While pain is subjective, the conch piercing pain is often reported as more intense than a helix because the cartilage in the center of the ear is significantly thicker and denser. Most describe it as a sharp crunch followed by a dull throb.
Can you wear earbuds with a conch piercing?
You should avoid earbuds for the first 4 to 8 weeks. Because an inner conch sits near the ear canal, earbuds can put direct pressure on the jewelry, causing irritation or bacteria transfer. Once healed, most people can wear them comfortably.
How do I know if my conch piercing is infected or just healing?
Healing involves crusties and minor swelling. An infection is different, watch for throbbing pain, skin that is hot to the touch, and thick green or yellow discharge. If you see red streaks radiating from the site, seek medical advice immediately.
Can I get a conch piercing if I have a small ear?
Absolutely. One of the best things about this placement is its versatility. A professional piercer can customize the position within your cartilage bowl to ensure the conch piercing jewelry fits perfectly, even on smaller or more unique ear shapes.
How long until I can change my conch piercing jewelry?
You can usually downsize your post for a better fit at 6 to 8 weeks, but you must wait 6 to 12 months before switching to a hoop. Changing to a ring too early is the number 1 cause of a conch piercing bump due to the added tension on the fistula.